








Last monsoon season a ready-mix plant in Dongguan lost 11 hours of production because a shaft-end seal on its twin-shaft unit started weeping cement slurry at 3 AM. By the time the night shift caught it, the slurry had traveled through the bearing housing, set like concrete around the shaft journal, and turned a 40-minute seal swap into a full bearing teardown. The bill – parts, labor, lost batch – ran north of ¥38,000. That is the real cost of ignoring the first wet streak at the gland.
I have rebuilt enough of these seals – on Tongxin Mashine units, on European agitators, on no-name mixers welded up in Shenzhen backlots – to know that most twin shaft mixer seal leakage follows the same five scripts. This guide walks through how I diagnose and repair it, with the numbers and the gotchas the equipment manual rarely spells out.
Why the Shaft-End Seal Fails First?
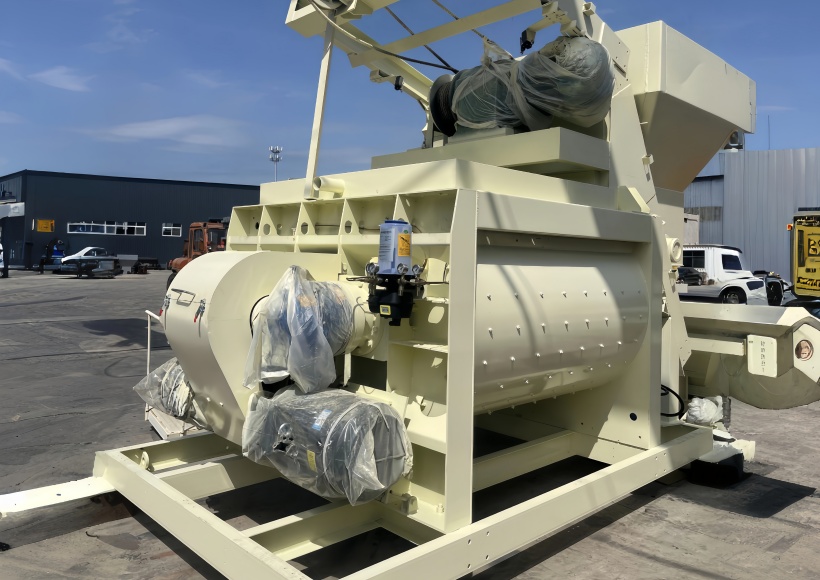
The shaft end seal is the sacrificial component in a twin-shaft mixer. It sits exactly where the rotating shaft exits the mixing drum, which means it lives at the intersection of three enemies: abrasive slurry, shaft runout, and marginal lubrication. Everything else on the mixer – the paddles, the liners, the drive – is overbuilt. The seal is not.
A Twin Shaft Concrete Mixer runs abrasive cement slurry at full load, often with aggregate up to 20mm. That slurry is hunting for any gap. Give it a 0.1mm lip-seal gap from runout and it will pack itself into the seal chamber inside a week.
The Five Failure Modes
- Abrasive ingress – cement fines migrate past the lip seal, embed in the elastomer, and lap the shaft journal until shaft wear exceeds tolerance.
- Dry running – a blockage in the automated lubrication system starves the seal; friction heat degrades the seal material, sometimes in hours.
- Shaft runout – anything above 0.08mm TIR and the lip can’t follow the shaft. This is almost always a bearing issue, not a seal issue.
- Misalignment – the seal assembly is torqued down against a cocked stationary ring. The rotating ring wears axially and fails.
- Chemical attack – wrong elastomer for the slurry. Standard NBR in a high-temperature, oil-rich service swells and extrudes.
That’s the diagnosis ladder. Let’s walk the repair.
Diagnosing the Leak Before You Tear It Down
Before you pull the seal, confirm where the leak is actually coming from. Oil leakage from the bearing housing looks like seal failure but is a different job.
- Wipe the area dry, run the mixer empty for 2 minutes, and watch with a flashlight.
- Slurry weeping past the lip seal dries grey-white. Oil leakage from the bearing comes out amber and smells like gear oil.
- Use an infrared thermometer on the seal housing – anything above 70°C at the gland means friction heat, not just process heat.
If the dial indicator shows shaft runout above 0.08mm, stop. You are about to install a new seal that will fail in the same window the old one did. Fix the bearing first. I have watched operators swap three seals in a week on a mixer with 0.15mm runout and blame the seal vendor every time. That’s a trap.
Tools and Materials
Keep a dedicated seal-repair kit on the shelf. The downtime cost of waiting on parts is brutal.
- Socket wrench set, Allen wrenches, pry bar
- Dial indicator – 0.001mm resolution minimum
- Calibrated torque wrench, not a guess
- Infrared thermometer
- Compressed air for cleaning
- Replacement parts kit: lip seal or packing material, O-rings, gaskets
- Lubricating oil at the OEM-specified viscosity (commonly ISO VG 220)
- Barrier fluid if your unit runs a pressurized dual-seal arrangement
On the elastomer: do not default to whatever the local seal shop stocks. For cement slurry, polyurethane or high-durometer NBR holds up. For corrosive chemical service, specify FKM. The OEM spec sheet exists for a reason – read it.
The Repair, Step by Step
1. Lock Out and Drain
Lock out the machinery. Tag it. Drain the mixing drum. This is not optional – a twin-shaft mixer that lurches over with someone’s arm inside the seal chamber is a fatality, not a repair.
2. Pull the Old Seal Assembly
Strip the gland bolts. Use the pry bar to ease the seal assembly out radially. Do not lever directly against the shaft surface – you will score the journal and the new seal will leak from minute one. If the slurry has set in the chamber, soak it with penetrating oil and blow compressed air before prying.
3. Clean and Inspect the Shaft
Clean the shaft surface down to bare metal. Now measure.
- Dial-indicator the shaft for runout at the seal journal. Acceptance is typically under 0.05mm TIR.
- Feel the journal for a wear groove. If your fingernail catches a groove deeper than 0.2mm, the shaft needs sleeving or replacement – a new lip seal will not bridge a worn journal.
- Check the seal chamber bore for rounding. A cocked or oval chamber means the new stationary ring won’t seat true.
4. Install the New Seal
Lubricate the new seal components with the specified lubricating oil before installation – dry installation tears lips. Seat the seal in the correct seal position per the OEM drawing; installing it backwards is the single most common rework I see. Torque the gland bolts in a cross pattern, not in a circle, and use the wrench – 45 Nm is typical, but follow your equipment manual. Over-torque extrudes the elastomer. Under-torque and the pressurize step on startup blows the seal out.
5. Restart and Verify
Pressurize the lubrication system before slurry hits the mixer. Watch the seal for the first 10 minutes of full load. A tiny weep on a lip seal is normal during break-in; steady dripping is not. If you see steady flow, shut down – you have a misalignment or a cocked ring, and re-running it will ruin the seal.
Preventing the Next Failure
Repair is the expensive part. The cheap part is the maintenance discipline that keeps you out of this corner.
Lubrication Discipline
- Verify the automated lubrication system actually delivers. A blockage in the feed line is the silent killer. Check flow at the gland, not at the pump.
- Use the correct viscosity. Thin oil in a high-temperature service leaks past the lip; thick oil in a cold-weather startup doesn’t flow at all.
- Sample the oil quarterly. Abrasive fines in the oil mean the seal is already failing internally.
Slurry and Load Management
A second Twin Shaft Concrete Mixer on the same line doubles your throughput – and your seal problems if you push both past rated mixing load. Monitor particle size in the batch; oversized aggregate accelerates shaft wear and hammers the seal. Don’t overload the mixing load beyond spec. Full load on a worn seal is how you go from a weep to a gusher overnight. Keep the mixing drum clean – hardened slurry buildup throws the shaft out of balance and runout climbs.
Elastomer Selection
The right elastomer is 80% of seal service life. Match it to the real working conditions, not the catalogue defaults. Polyurethane for abrasion, FKM for heat and chemical service, high-durometer NBR for the middle ground. When in doubt, send a slurry sample to the seal vendor and let them specify.
When to Stop Repairing and Call the OEM?
If you are swapping seals more than twice a year on a unit that should run 18 months between services, the mixer has a deeper problem – runout from a bent shaft, a distorted mixing drum, or a bearing housing that has gone out of tolerance. At that point you are not repairing a seal, you are masking a structural failure. Call the manufacturer or a qualified heavy machinery engineering service. Continuing to patch it is how a ¥2,000 seal job becomes a ¥80,000 shaft-and-bearing replacement.
The same goes for high-pressure or barrier-fluid dual-seal arrangements – those are engineered systems, not field-rebuildable cartridges. Reinstall per OEM procedure or send the cartridge out. Environmental compliance fines for slurry discharge are real, and they land on the plant owner.
Maswali Yanayoulizwa Mara kwa Mara
Q1: How much shaft runout is too much?
Anything above 0.05mm TIR at the seal journal will cut seal life. Above 0.08mm, expect premature failure inside a month. Fix the bearing first.
Q2: Can I reuse the old O-rings?
No. Compressed O-rings take a set and will leak. Replacement parts kits are cheap; seal-related downtime is not.
Q3: Why does my new seal leak immediately on startup?
Usually one of three things: seal installed backwards, gland under-torqued, or the lubrication system not pressurized before slurry hit the chamber. Shut down and check all three.
Q4: Lip seal or packing – which lasts longer in abrasive slurry?
Packing handles contaminated slurry better but needs regular gland adjustment and weeps by design. Lip seals run clean but fail fast on abrasion. For cement slurry I lean packing; for clean mortar mixers, lip.
Q5: How often should I inspect the seal?
Weekly visual check, quarterly dial-indicator runout check, annual full teardown for units in heavy-duty service. Plants that skip the quarterly runout check are the ones calling me at 3 AM.